
This guide is meant to quickly outline the essential setup steps in order to make use of Quick Quote.
As of 12/18/2020, Quick Quote is in beta.
Quick Quote is an api product distributed through us, Compliance Publishing, that gets installed on an affiliate’s website. It allows current or potential customers to input basic information about the services they need and when they want those services performed. In return Quick Quote will determine if the customer is in the service area, give the customer a price quote, along with automatically creating their account and schedule for routing. It also allows sub-contracting affiliates to potentially be a part of another affiliate’s service area and results. And an affiliate group can be set up if you use more than one affiliate account and need them all to be a part of the same Quick Quote installation on the same website.
Quick Quote requires the setup of other Compliance Publishing affiliate products, although continued use of these products isn’t mandatory. This guide is meant to outline the essential setup steps in order to make use of Quick Quote. If you are an established affiliate, some of these steps may be redundant, but please read everything thoroughly.
Step #1 – Obtain Quick Quote Product Access
Quick Quote is an affiliate product that needs to be enabled, much like the manifest, billing, or routing system need to be enabled. Quick Quote should be enabled by default. If it is not, please contact us at support@compliancepublishing.com to obtain this access, and any other access you may need. Every affiliate account that wants to make use of Quick Quote in any capacity, even as a sub-contractor for another affiliate, needs to have the Quick Quote product enabled.
When you have product access, log in to the affiliate portal at www.compliancepublishing.com/company2.php with your super admin credentials. You will see a new Quick Quote button in your top navigation.
Step #2 – Manifest System Setup
If you are not already set up with the manifest system, you need to be. The first step is to configure which waste/service types you will be using. This can be done by clicking Getting Started in the main navigation, then find Service Types under the Manifest heading.
At this point you can add your individual items/services that will be available for the customer to choose from, on the same page under Manifest Item/Service List. The Quick Quote system determines service area based on the service radius of your transporter offices, truck locations, treatment facilities, and transfer stations, all of which can be edited on this page. You can also set up a default service radius under Quick Quote Settings on this page.
Step #3 – Billing Setup
If you are new to billing, here is our getting started guide: http://support.compliancepublishing.com/knowledge/billing-/-invoicing-process-on-compliance-publishing
Click Getting Started in the main navigation, and then find the Billing section. Follow the steps one at a time. The price quote that a customer will receive is based on rules and fees that are set up on this page. Every rule belongs to a rule class. Every rule class will have its own rule structure.
In the Rule Classes section is also where you declare your Quick Quote Rule Classes, which are the classes that will be used when a new customer goes through the quick quote process. This step is mandatory, quick quote can't work if you don't tell it what rule class you want the pricing to be based off of.
For every individual service that you want the customer to choose from when going through the quick quote process, you need to establish a rule with a Quick Quote Price under the rule class that is declared as the Quick Quote rule class. For instance, if an affiliate is servicing medical waste, and they have added a 3 Gallon container to their item list, at minimum a rule needs to be created under the established quick quote rule class that covers "1 to All" 3 Gallon containers. And that rule needs a Quick Quote Price in order for that item to be available for the customer to choose from. Individual states can have a quick quote price, which will override the base quick quote price where appropriate.
If an already existing customer, who is set up with rule classes that differ from the declared Quick Quote Rule Classes, goes through the quick quote process, the services they have available to choose from will be based on the rules set up under their rule class. This means that all rules under all rule classes will be allowed to have a Quick Quote Price declared.
When dealing with sub-contractors (see step #8 in this guide), you need to account for the sub-contractors service list. You can set up rules for the individual sub-contractor services, just like your normal rules, or you can match sub-contractor services to your own services, in which case the rules are shared.
When creating rules, it is recommended to base your billing on number of items/services and not on weight. If weight is your basis, the customer going through the quick quote process will be required to enter a weight in order to get an accurate price quote, which may be burdensome to obtain and may discourage the customer from completing the quick quote process.
Step #4 – Quick Quote Settings
On the Getting Started page, click Quick Quote Settings. Here you will set up your API Keys. For every website where you want to install Quick Quote, you will need an api key. If you have more than one affiliate account, and they all use the same website, contact us to get yourself set up under an Affiliate Group. This will allow all of your affiliate accounts to operate as one for quick quote purposes.
Take a look at the other settings on this page to tailor your Quick Quote behavior.
Step #5 – Installing Quick Quote
With the basic setup in place, you can now try it out. To test and get a basic feel for quick quote, you can try it out directly from the affiliate portal under Quick Quote > Demo. You can install Quick Quote on to your website on the page of your choosing by inserting a couple of html snippets. Make sure you are using the proper website url that matches with your api key. On that page, inside the html head tag, add the following:
<script type="text/javascript" src="https://www.compliancepublishing.com/cp_qq/cp_qq_api.js?cpkey=YOUR_API_KEY_GOES_HERE"></script>
Replace “YOUR_API_KEY_GOES_HERE” with the api key that you established.
Place the actual Quick Quote form in the body of your web page where you want it by adding the following:
<div id="cp_response_container"></div>
The quick quote elements get populated inside of the div element. You can style the quick quote content however you see fit by creating your own css styles. The width of the div is the main change to make to fit the quick quote elements properly on your web page. The default is 300px. It isn't recommended to go too much bigger or smaller than that, but you are free to adjust the width however you like to fit it into a specific space. As an example, if you wanted to adjust the width to 350px you could use this div html instead:
<div id="cp_response_container" style="width:350px;"></div>
If you are using Wordpress, one way Quick Quote may be installed is using the [/] Shortcode widget. Simply copy the script tag and div tag directly into the ShortCode block. For example:
WordPress Widget: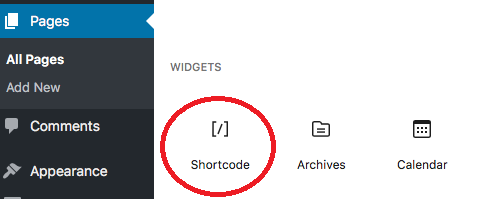
Shortcode block: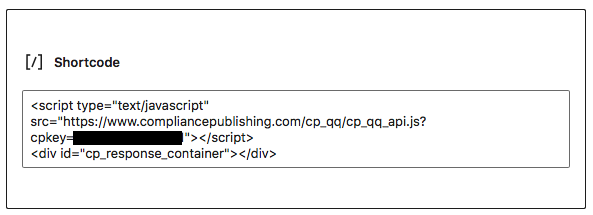
Step #6 – Routing Setup (optional)
When the customer goes through the quick quote process, they will be presented with recommended dates for their service. These dates are based on established routes. If no routes are present in their service area, and you or a sub-contractor have established that you are in the service area, then only a custom date will be presented for the customer to fill out. So, use of the routing system is optional, but highly recommended.
Brand new affiliates won't have routes in place. If you are a brand new affiliate, you have the option to add all of your customers to the affiliate portal via spreadsheets. When you have your customer base in the system, routes can be determined by establishing a service schedule for each customer.
Navigate to Routing & Scheduling. Make sure all your service routes are in place in order for Quick Quote to be as accurate as possible.
Step #7 – Edit Your User Access (optional)
If you have multiple user logins for the affiliate portal, you will need to determine which of those should have Quick Quote access. Brand new affiliates can skip this step.
When logged into the affiliate portal, navigate to Affiliate > User Access and give Quick Quote product access to whichever affiliate users need it, beyond your super admin user.
Step #8 – Editing CP Net Partners (optional)
If you are partnered with another affiliate via CP Net, you will need to determine Quick Quote rights between the two of you. Brand new affiliates, or affiliates who do not use CP Net, can skip this step.
Navigate to CP Net. If you want a partner affiliate to act as a sub-contractor for your Quick Quote installation, or you want to be a sub-contractor for another affiliate’s installation, you need to establish it under Partners on the CP Net page. If you already have partners, you can edit the settings of every partner connection you have. Editing these settings will need to be approved by the partner affiliate.